Following on from our post about fitting solar panels to the Alu-Cab Icarus roof on our Defender, the next step was to install the auxiliary battery, run the internal wiring, fit the charge controller and fit the diesel heater!
Diesel Heater Location
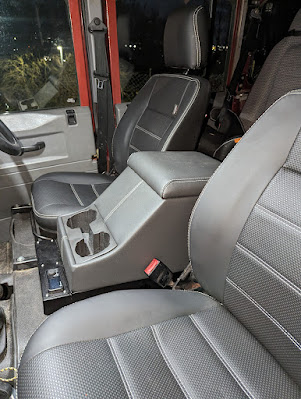
After much debating on the position for the diesel heater in the Defender, we decided that the best solution for us was to remove the front middle seat and fit the heater in the Nakatanenga heater console.
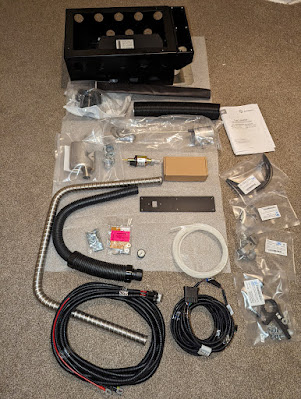
Nakatanenga supply a full heater kit for the Defender, with all of the components required to fit it. The only UK supplier is 4x4overlander, the website is not always up to date with stock, so do give them a call or email to confirm availability.
Mounting the Diesel Heater in the Console
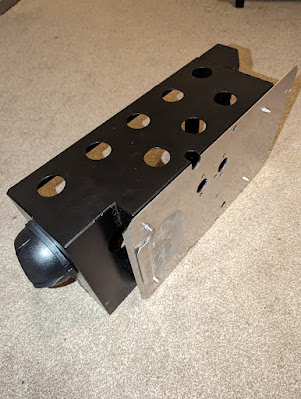
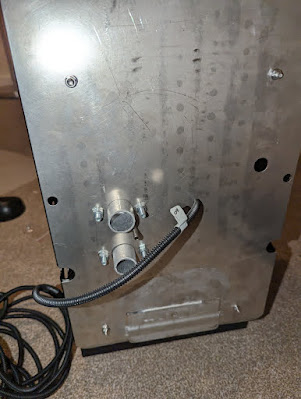
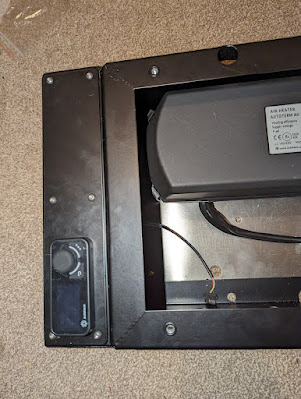
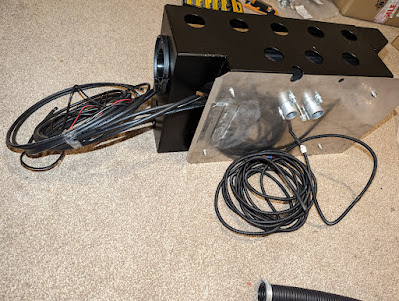
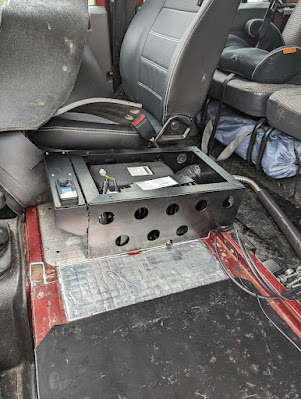
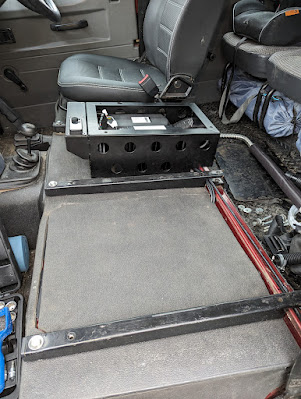
I started by fitting the heater console to the mounting plate, and then fitted the heater inside the console. The power supply to the fuel pump can be fed through the small hole in the mounting plate.
The console comes with a few options for the mounting plate for the controller, we decided to just keep it simple at this stage and got the option with a single hole for the controller. The controller has a backing plate which is bolted through the plate, and then the controller simply clicks onto the backing plate.
Solar Charge Controller
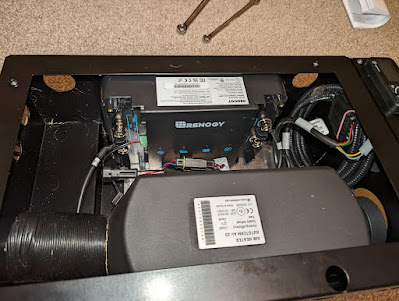
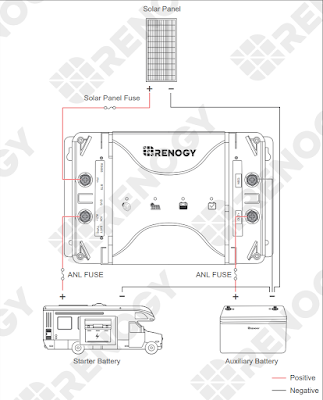
We decided to make use of the additional space in the heater console to mount the Renogy solar charge controller. We went with a 30A DC-DC Battery Charger with in-built MPPT.
(Use this link for a 7% Renogy discount code on your purchase.)
The charge controller fits nicely inside the heater console, with plenty of space for the required wiring.
I wired up all of the cables to the charge controller at this stage, and left the cables long so that they could be run to their final positions in the battery compartment.
In hindsight I should have also fitted the air intake, exhaust pipe and fuel line at this stage too, as they are really fiddly to fit from underneath once the heater is in position.
Installing the heater assembly
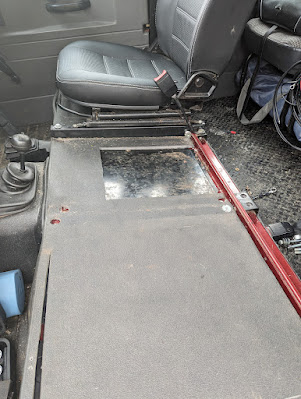
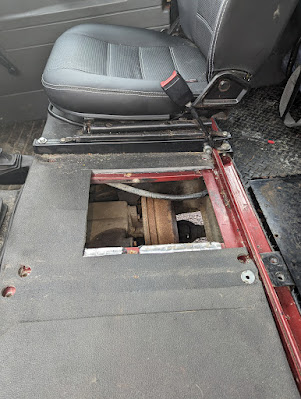
The first step was to remove the centre seat, I also removed the passenger seat to make access easier.
The positive cable from the solar panel is also fed along this route and into the charge controller, while the negative cable from the panel is fed into the battery compartment.
Battery Compartment and Solar Wiring
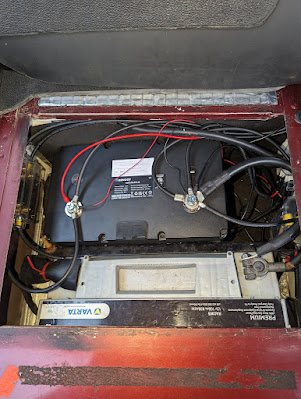
With a bit of shuffling about, I managed to get the original start battery moved over slightly which made enough room for the new 100Ah Renogy lithium (LiFePO4) auxiliary battery.
There's also enough room for the ANL fuses required for the solar wiring and a new Blue Sea auxiliary fuse panel, which all of the auxiliary loads will be wired to. At the moment the only auxiliary load is the power to the lighting in the Alu-Cab roof, but the plan is to add some more charging points in the back later, and maybe some heated seats!
The two ANL fuses are mounted to the front of the seat box, and the auxiliary fuse panel is mounted to the back of the seat box.
The diesel heater comes with a fused power supply, so this was wired straight to the auxiliary battery, and the fuse holder mounted beside the new auxiliary fuse panel. With everything in position the solar cables can be cut to length, terminated with a crimping tool and wired up to the correct positions.
Air Intake, Exhaust and Fuel Line
With everything sorted inside the Land Rover, it was time to fit the external components. Thankfully it's easy enough to crawl under a Defender, so no need for ramps etc.
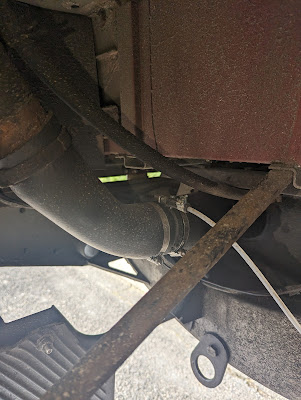
As I said earlier, it would have been easier to fit the air intake, exhaust and fuel lines before fitting the heater assembly into the vehicle, but it is possible to fit them from underneath. All three lines are pretty close together, so it's just a bit fiddly getting the lines into position and tightening up the fasteners. It would probably be best to do the fuel line first, as this was really awkward!
The heater kit is supplied with a fuel pick up, which fits into the Defender fuel filling trunk. I popped the filling line off, cut the pipe at the required position, fixed the fuel pick up into position, then re-fitted the whole assembly. Don't do this with a full tank, while parked on a slope, or you will spill diesel everywhere - trust me!
Bending the fuel pick up pipe down a bit, lets you decide whether the pick-up reaches all the way to the bottom of the tank, or leave a bit of reserve in the tank, so that the heater can't run the tank empty.
The air intake pipe also runs towards the back of the vehicle, but closer to the middle and above the chassis cross member, so that there is a bit of separation between intake and exhaust.
Powering up!
With everything connected, it was time to power up and test the heater out. It took a couple of attempted starts, to get the fuel pumped all the way from the tank to the heater, but after that it fired up straight away, and ran for the required 2 hour running in period with no problems.
Once everything was in and tested, we fitted the Exmoor Trim cubby box to the top of the heater console, and I think it looks great. Next up is the rear storage and sleeping solution for the boys!
Read more about the rest of Budgie's camper conversion.








No comments:
Post a Comment