The second phase of Budgie's camper conversion involved fitting a solar power system. After much research around split charge relays, battery to battery (B2B) chargers and battery composition, we ended up with a 175 Amp solar panel charging a lithium battery via a B2B charger.
Having used Renogy equipment on our RV camping trailer in Canada, they were an easy choice for the Land Rover Defender. (Use this link for a 7% Renogy discount code on your purchase.)
Mounting the Solar Panel
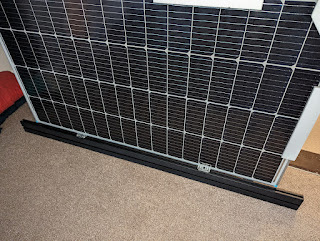
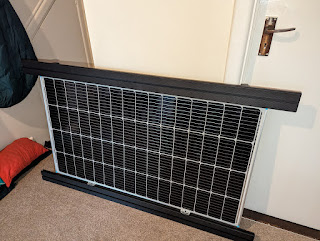
The first step was to mount the 175A solar panel to the roof. The Alu-Cab Icarus roof conversion comes with a track system and we paid a bit extra for a set of Alu-Cab load bars. The load bars are fitted with a t-track on the top and one side to allow simple fitting of accessories. It seemed to make sense to fit the solar panel between two of the load bars, but we wanted the bars to still be available to use for other equipment (like skis).
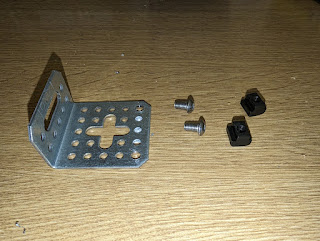
I'd seen a few people mount the panel flush with the bars, but I was worried about the panel getting damaged while loading, so decided to mount it below the bars. A few aluminium angle brackets and some t-slot nuts, made it quick and easy to fasten the panel to the bars.
The plastic end cap on the bars simply knocks off, allowing the t-slot nuts to be slid along the side-facing track. Using M6 pan head bolts, each bracket can be fastened loosely to the track.
With two brackets fitted to the load bar, the panel can be offered up and the brackets slid into position to align with the pre-drilled mounting holes on the panel. I used M6 flanged bolts and nyloc nuts to fasten the panel to the brackets.
Repeat for the other load bar.
Once the panel is fitted to the bars, the whole assembly can be slid onto the cargo track on the Icarus roof from the back. Once in the final position tighten up all of the fasteners.
Running the solar cables
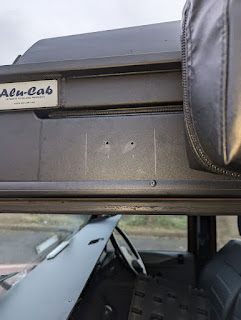
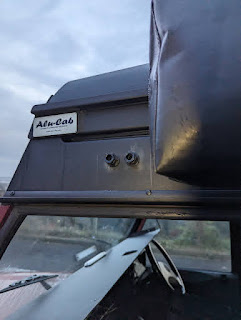
After removing the cab parcel shelf and the front passenger corner of the side panelling, I was ready to drill through the roof.
Drilling a pair of 18mm holes through the side of my new roof was terrifying. Measure twice (or three times) drill once!
I used a pair of 20mm cable glands to get the cables through the roof and into the cab.
I also fitted a cable entry housing over the top of the cable glands, just to be doubly sure that the holes were watertight. The housing was sealed and stuck in place with sika-flex, and held in place with a ratchet strap over the roof while it cured.
I decided to run the solar cables along the outside of the roof following the gutter line, which means they are mostly hidden behind the awning when the roof is closed. Remember to leave enough length for the roof to open!
I used a pair of 1.5m (5ft) solar cable extensions between the panel and the front of the roof, and then a 3m (10ft) solar adaptor kit from the front of the roof to the battery compartment.
Once inside the cabin, the cables can be run along the inside of the Icarus roof to the B-pillar behind the passenger door. Routing down the B-pillar, takes the cables to the battery compartment under the passenger seat.
Read on for info about the internal wiring and fitting the diesel heater.





No comments:
Post a Comment