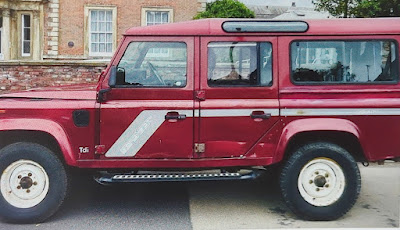
We purchased our new adventure wagon in October 2023 and we are now converting him into an off-road camper. I'll keep this post updated as we progress with the conversion.
Budgie the 110 Defender
Our new vehicle is a 1993 Land Rover Defender 110 County Station Wagon with the 200Tdi (Turbo Diesel Injection) engine. He was affectionately named Budgie by a previous owner's kids, apparently because he had a squeaky fan belt which chirped like a budgie!
Prior to our purchase, Budgie had an extensive renovation including a galvanised chassis and some serious rust repairs. He even came with a photo book recording the work done.
We'd been looking for a Defender since we arrived back in the UK; Ridley was looking at newer models but Sarah spotted the advert for Budgie, who was just down the road from us. The amount of work done meant that Budgie had already been 'future proofed', and we just couldn't resist.
Roof Tent vs Pop-Top
We'd been debating for a while whether to get one large family roof tent, two smaller roof tents, or a pop-top.
We really enjoyed our time in the Yukon, where we hired a Jeep with a roof tent, but we found the soft cover a bit of a faff to pack away and we knew that the boys would soon outgrow the space available in most large roof tents.
We seriously considered an iKamper or TentBox hard shell tent, but even the largest models didn't seem big enough for long term sharing for the four of us.
We thought about fitting two smaller roof tents, but it would require a specially adapted roof rack, and would be a considerable amount of weight up high, and pretty expensive.
In the end we decided on the Icarus pop-top roof conversion from Alu-Cab. While the roof will only sleep two, it is raised in seconds and packed away in only a couple of minutes. The pop-top has the added advantage of giving us standing room inside the Land Rover.
Fitting a Solar System to the Defender Icarus Roof
The next major upgrade was fitting a solar system to Budgie. We went with a fixed 175 Amp solar panel fitted to the Alu-Cab Icarus roof bars and a battery to battery charger. You can read more in our Fitting Solar Panels post.
Fitting a Diesel Heater to a Defender
The second stage of the solar wiring also included fitting a diesel heater to Budgie.
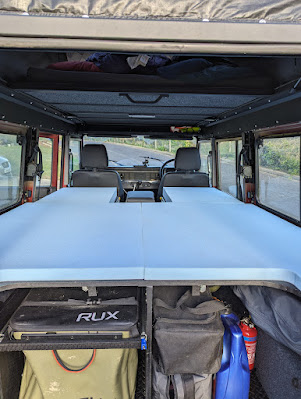
Defender interior layout for a family of four
The biggest challenge so far has been designing an interior layout that allows us to keep 4 travelling seats and comfortably sleep 4, but we think we've come up with a great solution! Read more on our recent post - Can you sleep a family of four in a Defender?
Phone Holder
Anyone who's driven a Defender will know that there is nowhere to put your phone! Budgie doesn't currently have a radio and we don't have a satnav, so we usually use a phone for music and directions.
I'd been looking for a new phone holder for a while, and recently came across an eBay listing for a 3D printed adaptor that would fit in the ashtray space on the dash. The adaptor allowed a Ram Mount to be fitted without drilling any new holes in the dash, and covered up the useless ashtray!
The adaptor was well made, and came with pre-marked positions which aligned perfectly to the Ram Mount 7" Tough Track. After drilling a few quick holes in the adaptor the Tough Track was quickly bolted onto the mount using the bolts supplied with the adaptor.
Once it was all bolted up, the assembly was fitted into the ashtray position and the securing arms tightened up with an allen key. The 1" mounting ball can then be fitted onto the track and the X-Grip phone holder accessory fitted to the ball. The track allows for additional accessories to be fitted later, I'll probably be adding a GoPro mount in the near future!
Overall it's a really quick and easy modification which solves the phone holder issue, only needs a drill and a couple of allen keys, is completely reversible, and makes use of the ashtray; highly recommended!
Adding a Defender roof access step
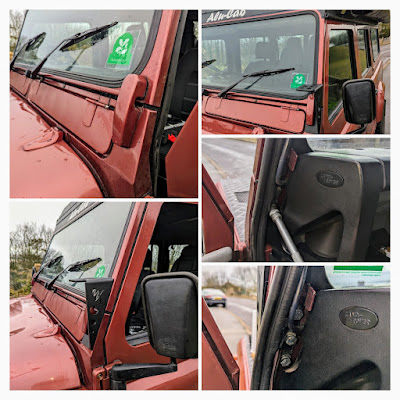
If you've ever tried accessing the roof of a Defender from the front, you'll know it's pretty easy to get up on the wings, but getting up the windscreen onto the roof is tricky. I'm always worried about damaging the window gutter, or scraping the paint!
I spotted a great step on the LR Challenge 4x4 web site the other day, which really solves this problem (and looks good in the process - in my opinion!).
It's a quick and easy modification, which I managed to complete in my lunch break yesterday. You simply undo three (13mm head) bolts which hold the window hinge in place. You will likely need to pull the door seal trim out of the way to get the socket head in. Replace the 13mm bolts with the longer (14mm head) bolts provided with the step, and position the rubber gasket and step over the bolts. Tighten up the bolts and replace the door seal - job done!
Defender 200tdi Alternator Upgrade
Our alternator failed the other day and since it needed to be replaced anyway, we took the opportunity to upgrade from the standard 45amp version (which had been fitted since 1993) for a new 70amp alternator upgrade from Britpart. This should charge our new leisure battery faster than the old alternator would have done.
* Make sure you disconnect the battery before starting work on the alternator!
I had a fear that there would be lots of other removals required to get the alternator out, like there was with the water pump a few weeks ago, but actually all it was pretty straight forward. All it required was the removal of the air filter housing (which can just be unfastened and moved over to the side) and an air pipe to the turbo (2 jubilee clips). With these out of the way, it was just a case of undoing the three securing bolts.


